
A while ago, there was an image on Microsoft Azure with which you could create a Kali-Linux virtual machine. Unfortunately, this image is no longer available.#
As cybersecurity issues have become more and more important in recent weeks, I have been looking at how to make it as easy as possible to create a Kali-Linux virtual machine in Azure to work with.
Prerequisites#
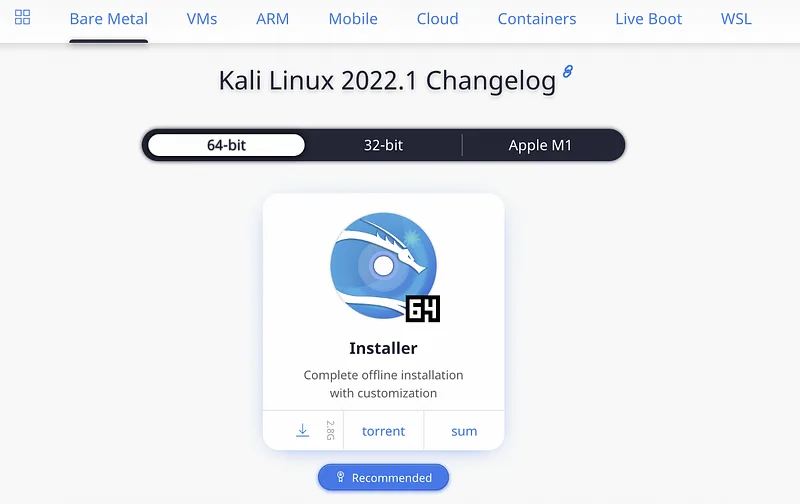
You need a Windows system with HyperV Manager to create a local virtual machine with Kali-Linux. Of course, this requires that you have downloaded a current Kali-Linux image. I recommend the offline installer (.ISO image):
Also, of course, an active Microsoft Azure subscription is required.
To upload the virtual machine file we will use the Azure PowerShell command (Add-AzVhd (Az.Compute) | Microsoft Docs) which is available in the Az PowerShell module. A guide to install it can be found here.
Resource Group and Storage Account#
To have all files regarding this topic sorted, we are generating a separated resource group in Azure, this can be done in the generate storage account workflow. You can leave all default values and just adjust the region. The region has to match the region you want to host the Azure VM later.
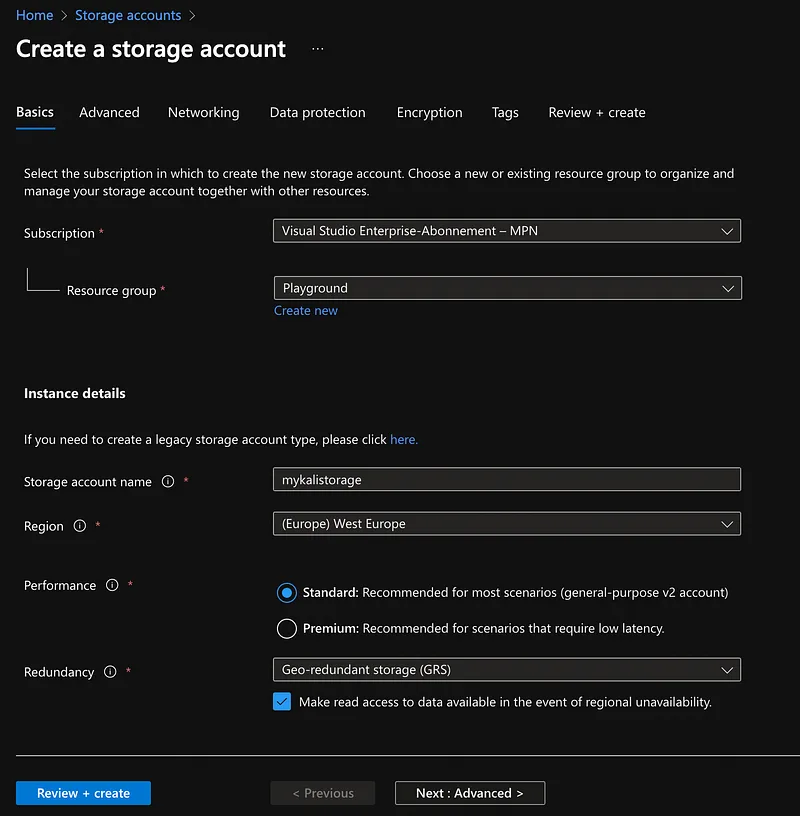
After we generated a storage account, we need to create a blob storage container in this account. Again, you can leave all default values. The container will be needed to upload the Virtual Machine File from your local PC later.
Local Setup#
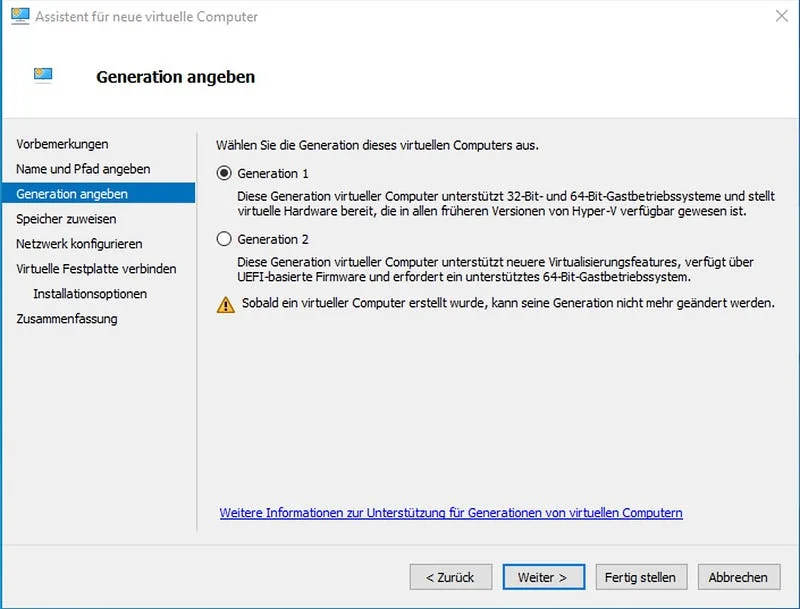
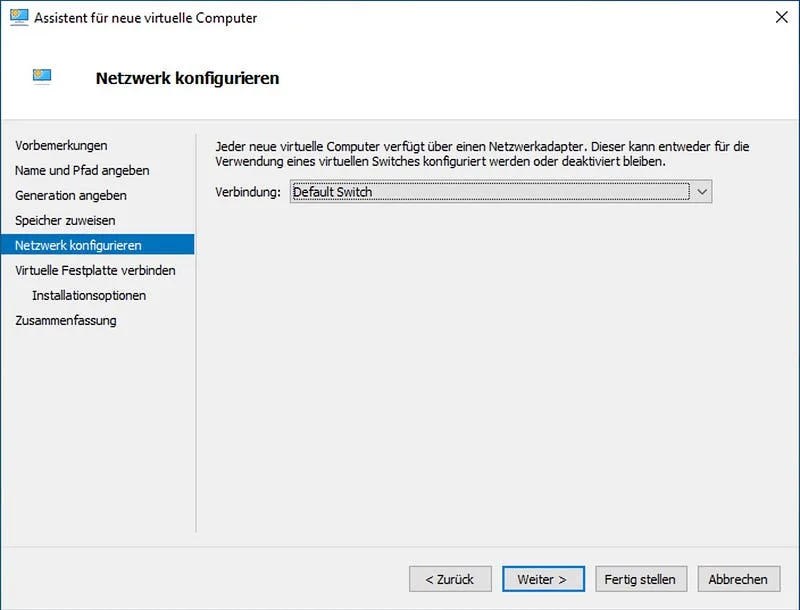
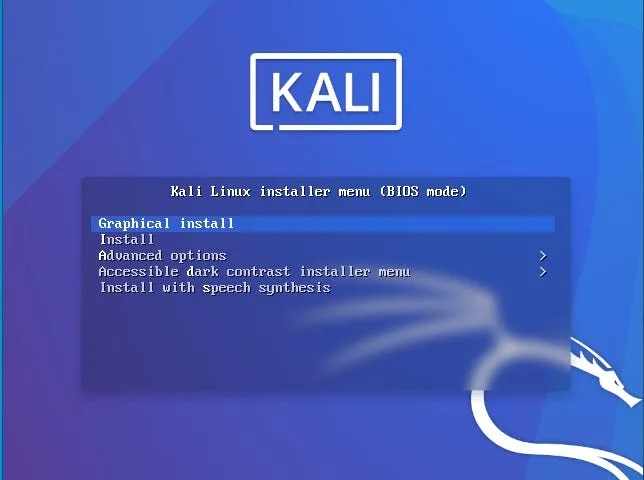
If you got HyperV Manager enabled on your Windows system, you have to generate a new VM (with Generation 1 and Default Switch Network) and attach the downloaded ISO-file to the VM to start and install from.
Attention: Make sure to select Generation 1 as VM Generation , otherwise the VM will not boot correctly. Differences can be looked up here: https://docs.microsoft.com/en-us/azure/virtual-machines/generation-2
In this blogpost I will not guide through the Kali installation. But it should be fast forward if you got no special needs.
Warning: Do not use GNOME Desktop as GUI. It disables some features of RDP and you will only see a black screen. But this can be fixed with additional bash commands.
If you are familiar with HyperV you can generate a separated drive with a fixed size (not dynamically sized like automatically), so it doesn’t have to be converted later, otherwise the converting and upload progress will just take longer.
After you successfully installed kali and started it up you need to update it before doing any other actions. Open a terminal and run the following command:
sudo apt-get update && sudo apt-get upgrade && sudo apt-get dist-upgrade
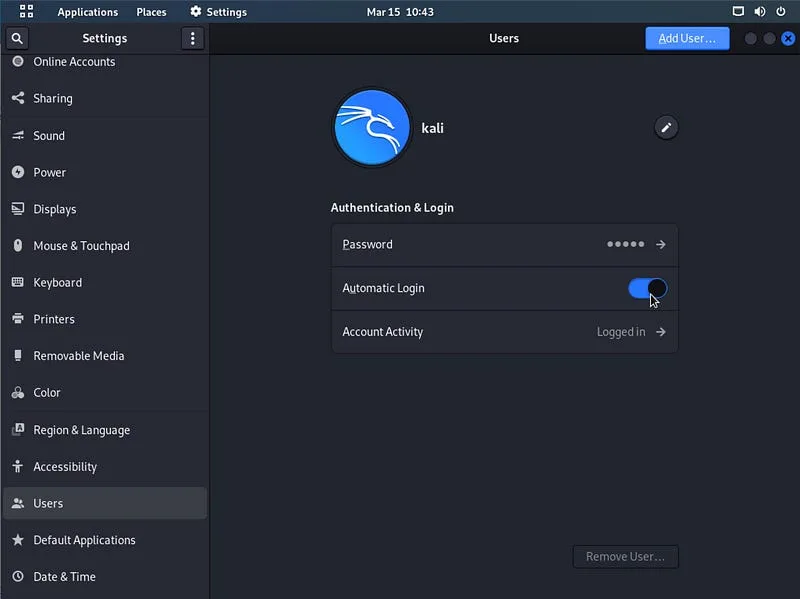
Configure the user to be auto logged in when starting up the VM. This can be done via Settings → Users:
Configure RDP and SSH#
Later it should be possible to connect to the machine via RDP and SSH. The following command will install XRDP and add it to the services to auto start at startup.
sudo apt-get install xrdp && sudo service xrdp start && sudo service xrdp-sesman start && update-rc.d xrdp enable
If you miss-configured or wanted to work on a GNOME GUI but still want RDP to be possible you need to execute the following commands also:
sudo apt-get remove gnome-core && sudo apt-get install lxde-core lxde kali-defaults kali-root-login desktop-base
sudo update-alternatives -config x-session-manager
Select /usr/bin/startlxde
Reboot your machine. RDP should now work fine.
If you also want to work with SSH we will use OPENSSH-Server:
sudo apt-get install openssh-server && systemctl enable ssh.service
This simply installs the openssh server and enables it on startup.
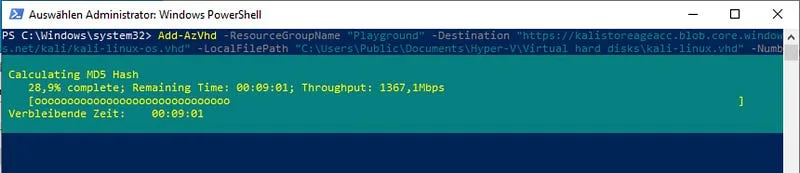
Now we got everything ready to deploy our virtual machine files to our blob storage container. Make sure to shutdown your VM on your local PC. Open a PowerShell command line as administrator and navigate to the directory where the .vhdx file is located. Execute the following command with adjusted paths and URL:
| |
This command will convert your .vhdx file (dynamic size drive) to an .vhd file (static size drive), detect empty blocks (to reduce file size) and upload it afterwards to your storage account. The upload can take some hours.
Setting up the VM in Microsoft Azure#
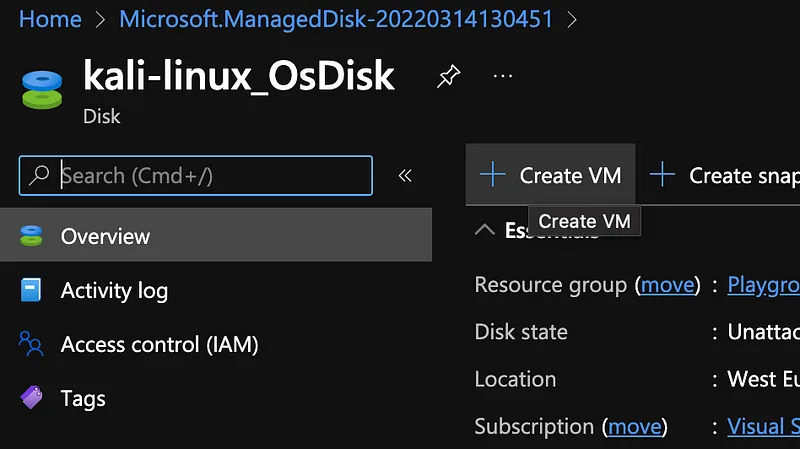
If you got your VM-file ready in your blob container, we can now generate a OS-Disk from that blob file by creating a disk at our generated resource group. As Source type you need to choose Storage blob , in Source blob fill the URL of your uploaded file or select it via Browse.
This can be copied from the PowerShell after the upload process or by navigating in Azure into the storage account to the file.
Hint: If your URL isn’t valid or you can’t find the blob via Browse , make sure, the region you’ve selected is the same as of the storage account.
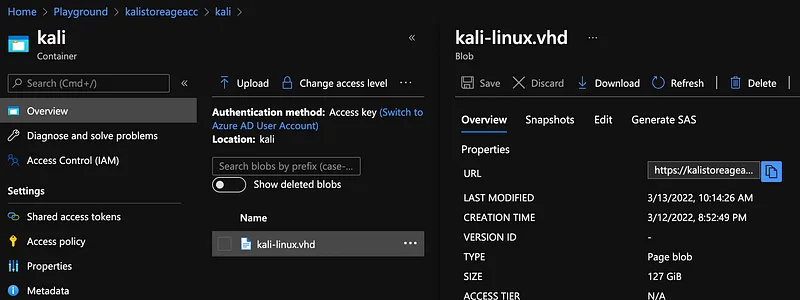
As Os type choose Linux and size can be set to 128 GiB.
Attention: As mentioned before, make sure to select VM Generation 1 again for the reasons mentioned.
Other settings can be set unchanged. After we generated the Disk we navigate to that resource and you should now be able to click Create VM on the upper left of this resource.
This should lead to a new dialog for creating the VM via disk. The disk should be preselected at the image property and you can select Other as License type at the end of the page. At the networking page of this creation dialog you can choose to select RDP and SSH as ports. Also I like to disable the Auto shutdown option at the Management section.
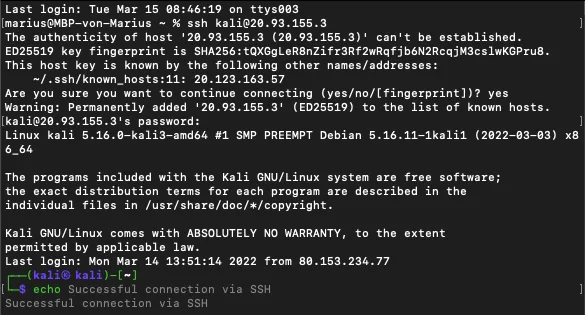
Now you should be ready to review and create your virtual machine. Copy the IP address assigned to the VM and connect to it via SSH or RDP as your needs.
Summary#
Unfortunately, the upload process is really time consumption, but overall the whole process is pretty fast forward. If you need any help, do not hesitate to comment to this blog post and I will try to respond asap.
To upload the virtual machine file we will use the Azure PowerShell command (Add-AzVhd (Az.Compute) | Microsoft Docs) which is available in the Az PowerShell module. A guide to install it can be found here.
Resource Group and Storage Account#
To have all files regarding this topic sorted, we are generating a separated resource group in Azure, this can be done in the generate storage account workflow. You can leave all default values and just adjust the region. The region has to match the region you want to host the Azure VM later.